
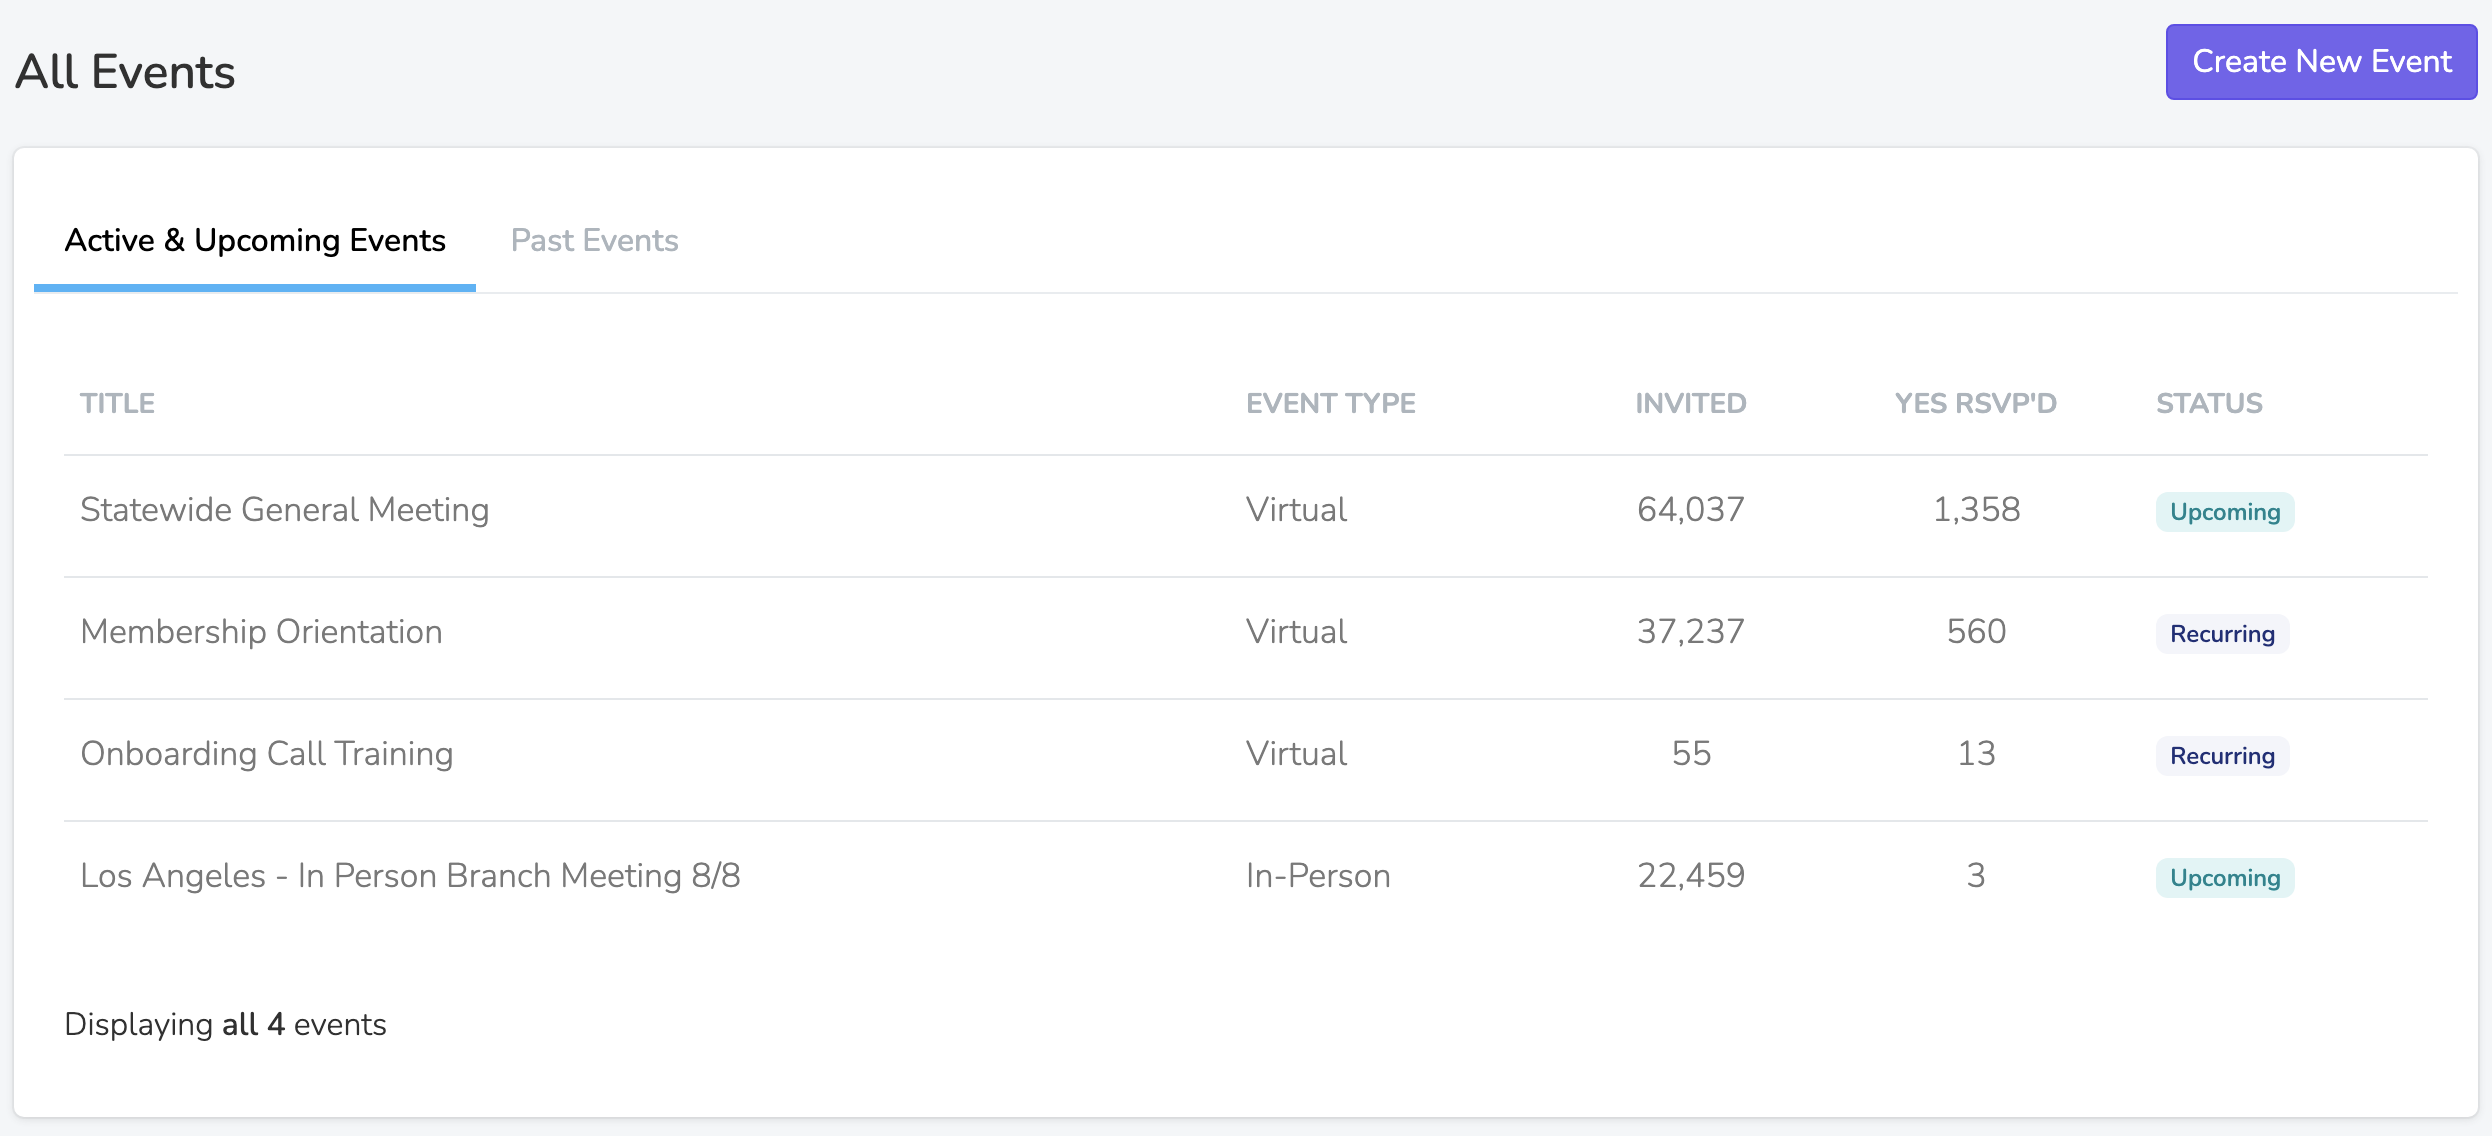
Events
Solidarity Tech's integrated event management system helps you plan and promote events, gather RSVPs, automate event reminders, and record attendance data. Here we'll walk you through how to organize successful events on the platform.
Looking for an overview? See our Events product page.
Create an Event
To create an event, you'll need to give the event a title, select an event type, and set the event start and end times. The event type cannot be changed later.
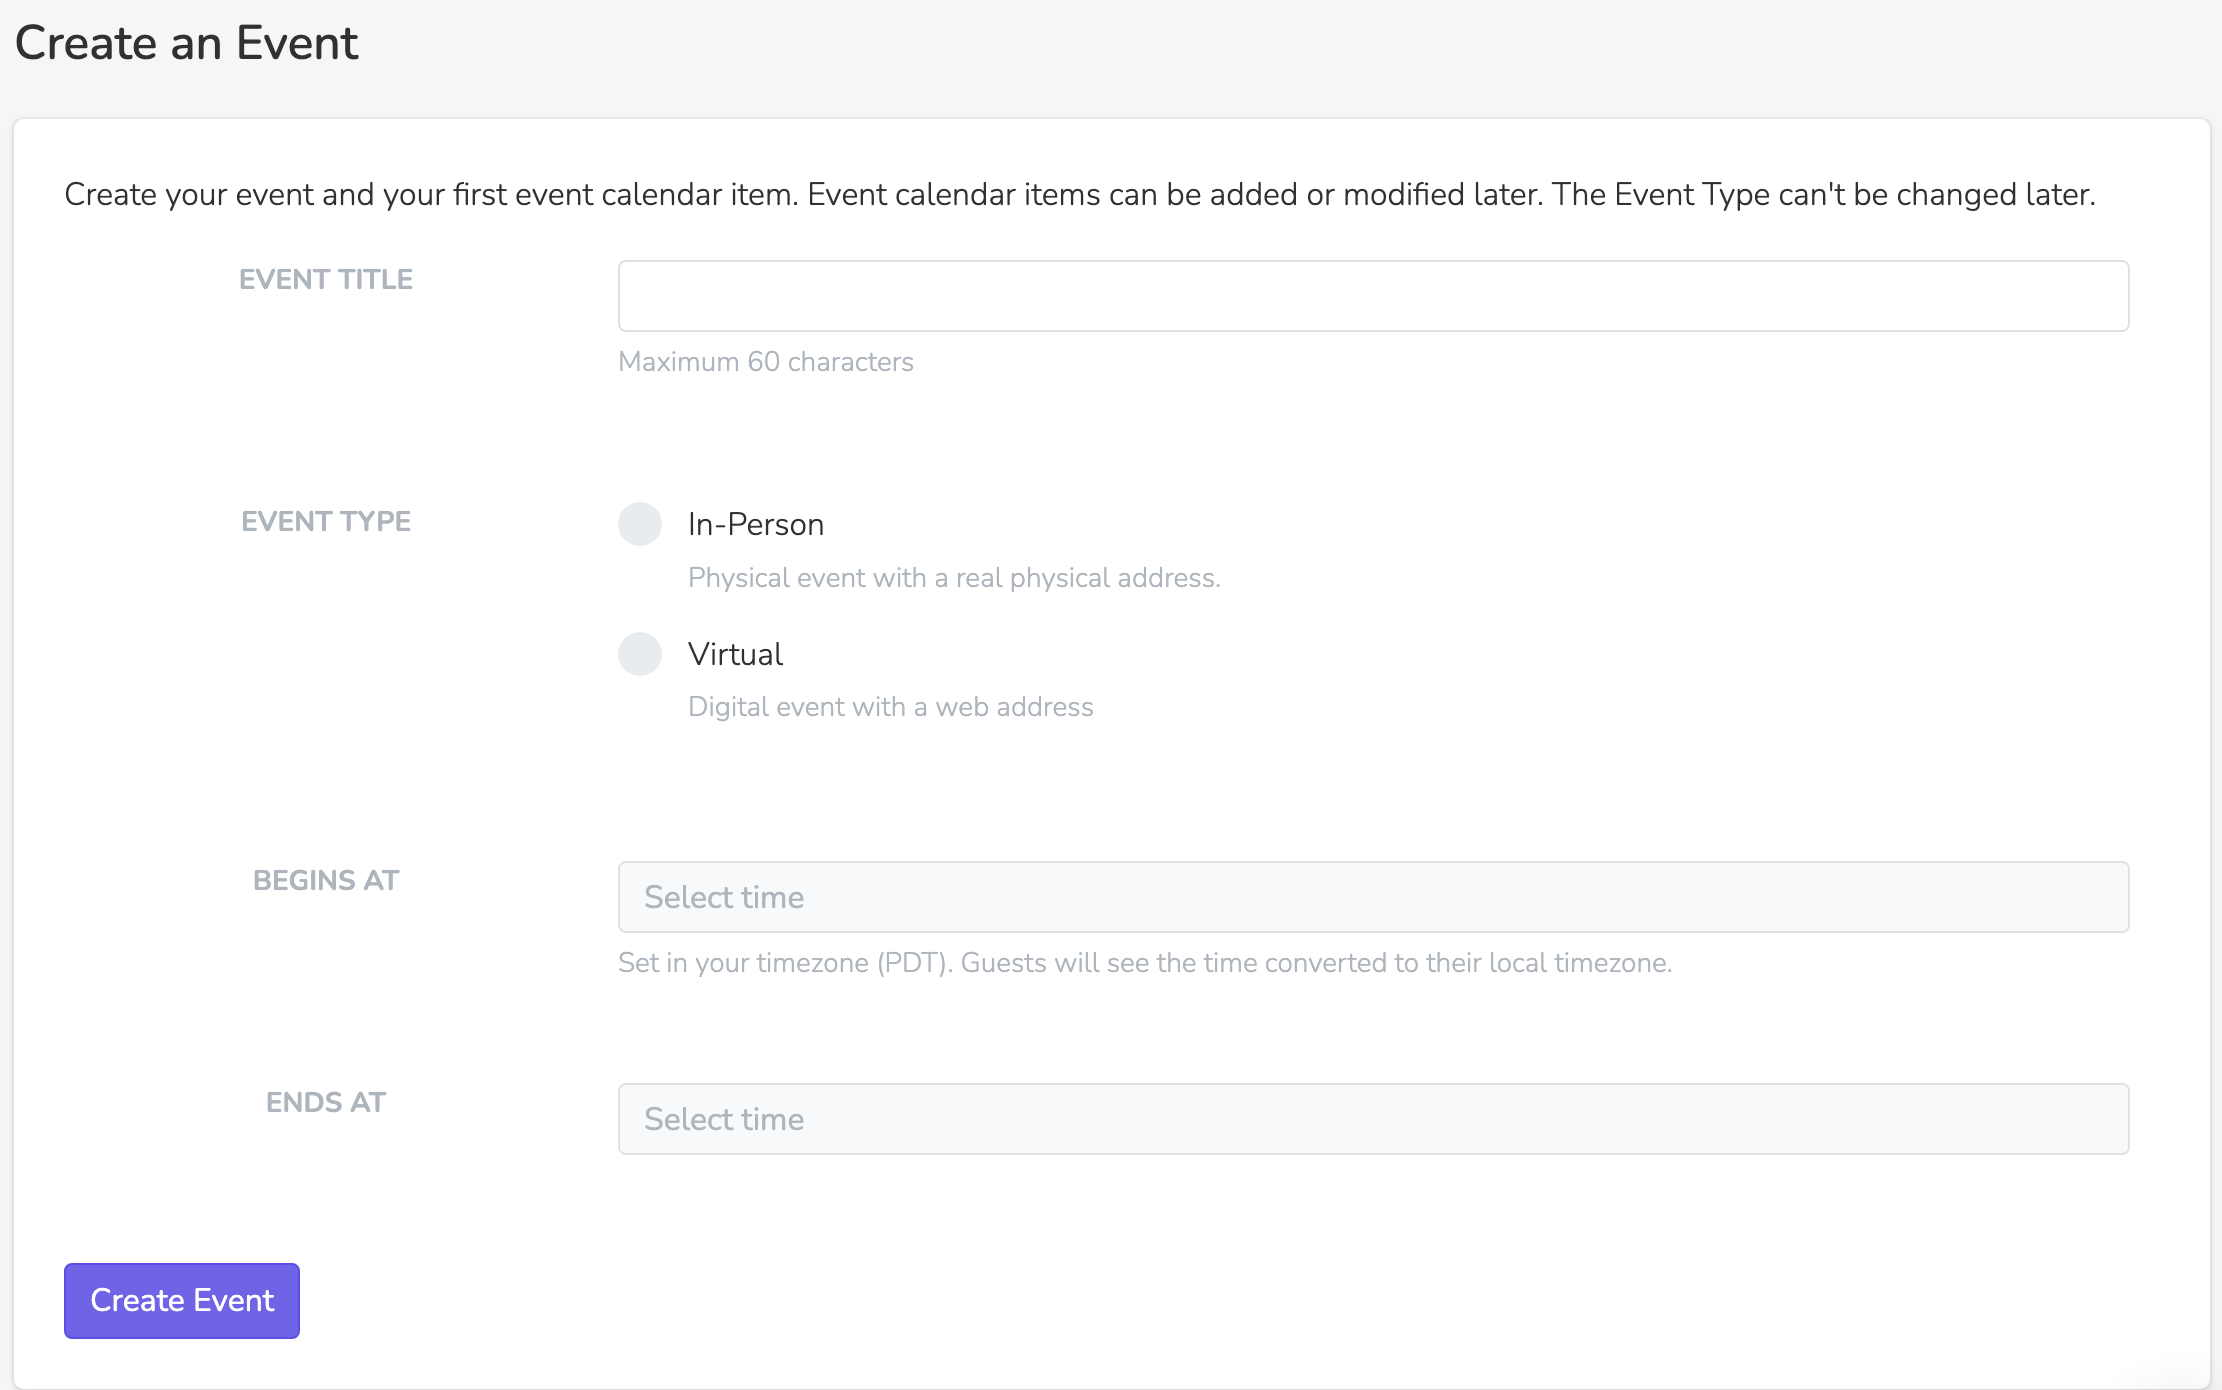
Event Type
There are three types of events:
In-Person: Requires a physical address on a map, and an optional location name (e.g., "LA City Hall").
Virtual: Requires a URL where the virtual meeting will take place. You can either paste in any meeting URL, or connect Zoom for automatic meeting creation, personalized join links, and attendance tracking.
Hybrid: Requires both a physical address and a virtual meeting URL. Creating a hybrid event automatically creates a paired in person session and virtual session for the same event.
Connect Zoom for virtual events: When you connect a Zoom account to a virtual event, attendees automatically get personalized join links and their attendance is synced automatically. See Zoom Integration for details.
Hybrid Events
Hybrid events let you support both in person and virtual attendance under one event. When you create a hybrid event, the platform creates one in person session and one virtual session and links them together as a pair.
For hybrid events:
- The in person side uses the physical address you entered
- The virtual side uses the meeting URL you entered
- In person confirmations, reminders, and calendar invites can also include a Virtual option pulled from the paired virtual session
Past events: You can't directly create events with dates in the past. To log historical event attendance: create the event with a future date, then edit the session date to the past date you need.
Event Sessions
Each event can have one or more sessions - specific times when the event occurs. This is useful for events that happen multiple times (e.g., a training offered on different days) or at different locations.
Adding Sessions
From the Schedule tab, click "Add Session" to create additional sessions. Each session has its own:
- Start and end time
- Session type
- Location (for in-person events)
- Title (optional)
When creating a new session, you can set its session type to In-Person or Virtual. After a session is created, its session type cannot be changed.
For hybrid event setups, you can pair an existing session with an unpaired session of the opposite type on the same event.
Editing Sessions & Calendar Updates
When you edit a session's start time, end time, or location, the system will prompt you to send calendar invite updates to everyone who has RSVP'd.
Automatic prompt: If RSVP confirmations are enabled and email confirmations are configured, you'll see a modal asking "Send calendar updates to X people?" after saving changes. This sends an updated calendar invite to all RSVPs who have email permission enabled.
Show RSVP Bar
If enabled, an RSVP bar with Yes/No/Maybe buttons is shown on a person's profile for every invited person, both in the dashboard and the mobile app. This is the bar that Team Members use to record RSVPs on behalf of people during outreach.
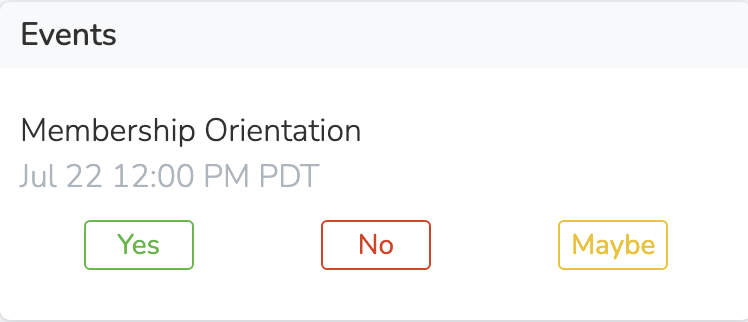
When a Team Member marks someone as Yes/No/Maybe through the RSVP bar, it automatically triggers any configured confirmation emails and gives the option to send follow-up texts.
This setting only affects the RSVP bar in the dashboard and mobile app. It does not affect the public event page. People can still RSVP themselves through the event page regardless of this setting. If you want to prevent self-RSVPs for a session, remove it from the event page's selected sessions instead.
Show Session Title on Event Page
By default, event pages display the session start time alongside a checkbox. If you have multiple sessions and want to show the session title alongside the time, enable this option.
Recurring Events
All events are one-time by default. You can create recurring schedules so sessions are automatically created on a regular basis.
To set up recurring sessions, click "Add Session" and select "Make Event Recurring." This opens a modal where you can configure the recurring schedule.
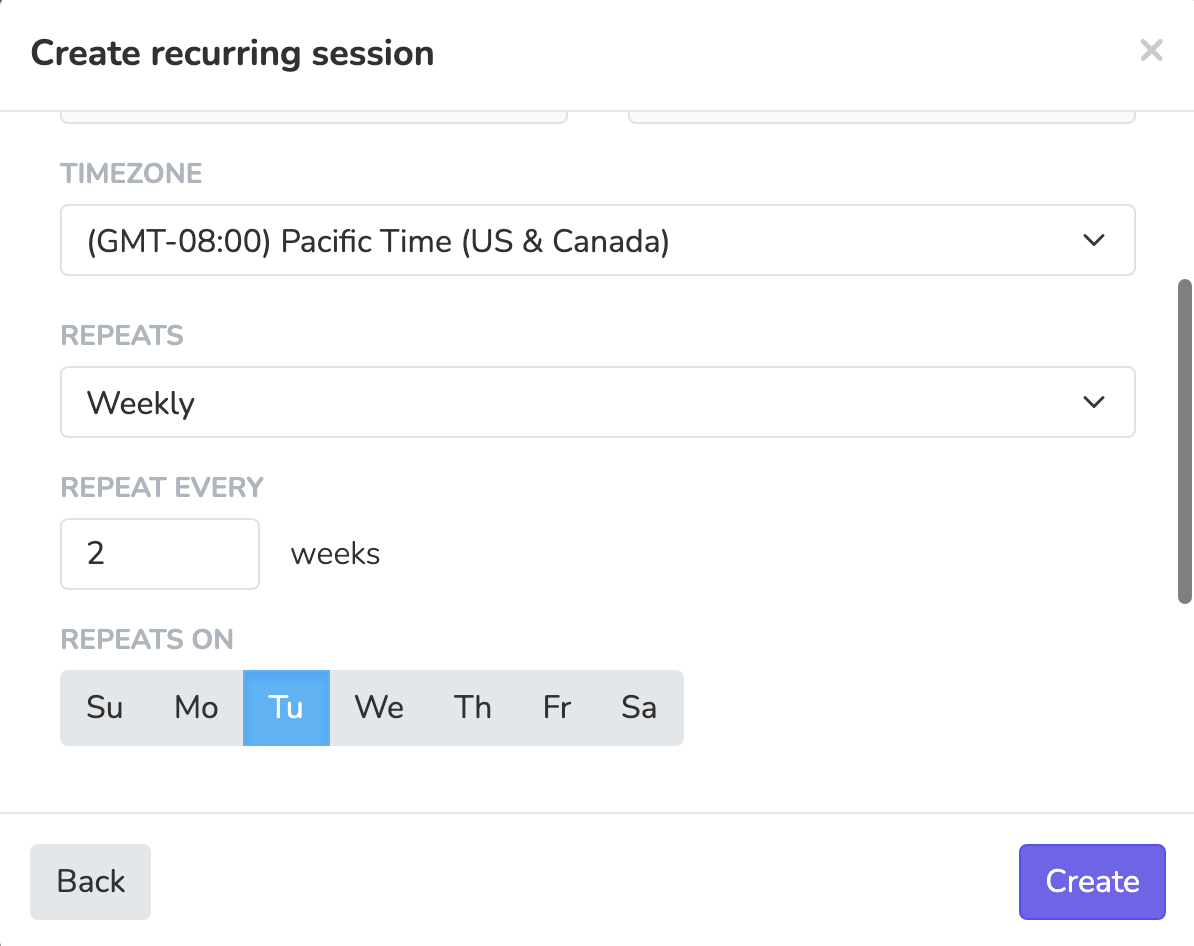
The above setting would create an event every other Tuesday, starting from the configured date.
Multiple Recurring Schedules
Events can have multiple recurring schedules. For example, you might have:
- A weekly Monday session at 12pm
- A weekly Wednesday session at 6pm
Each schedule operates independently and generates its own sessions. Add additional schedules by clicking "+ Add Recurring Schedule" in the Recurring Schedules section.
Frequency Options
| Frequency | Options |
|---|---|
| Daily | Every X days |
| Weekly | Every X weeks on a specific day (e.g., every Tuesday, every other Friday) |
| Monthly | By date (e.g., the 15th of each month) OR by week (e.g., the 2nd Tuesday, the last Friday) |
Session Title Template
For recurring events, you can use a template for session titles. Use {{ event-session.start-date }} to include the date in the title:
{{ event.title }} - {{ event-session.start-date }}This would produce titles like "Weekly Meeting - 03/15"
Days in Advance
The "Create sessions X days in advance" setting controls how far ahead new sessions are automatically created. Sessions are generated on a rolling basis.
End Date
By default, recurring schedules run indefinitely. You can optionally set an end date so sessions stop being generated after a specific date. In the recurring schedule settings, use the "Until" dropdown:
- No end date (default): Sessions continue to be created on a rolling basis
- On specific date: Select a date after which no new sessions will be created
This is useful for programs with a known end date, such as a 12-week training series or a campaign that ends on election day.
Auto-RSVP Team Members
You can automatically RSVP team members to sessions when they're created. In the recurring schedule settings, search for and select team members in the "Auto-RSVP Team Members" field. These team members will:
- Be automatically RSVP'd "Yes" to each new session
- Receive confirmation emails (if enabled)
- Get calendar invites added to their calendar
This is useful for staff or volunteers who should attend every recurring session.
Invited
The Invited tab lets you use a filter to determine which People will have RSVP bars shown on their profile. By default, all People within the event's Scope are invited.
Anyone can still RSVP to an event via a public event page, whether they're included in the Invited filter or not. The Invited filter specifically controls:
- Who sees RSVP bars in the dashboard/app
- Who can be targeted in event outreach tasks (phonebanks/textbanks)
Event Page
Event pages allow anyone to RSVP to event sessions directly from your website. These pages can be created from the Pages tab, or directly from the Schedule tab with the "Create Event Page" button.
Host an Event (Supporter Submissions)
You can let supporters submit their own events (house meetings, watch parties, canvass launches, etc.) by creating a Host an Event page linked to your event. Supporters fill out a form with their event details, and submissions are held for Team Member approval in the Submissions tab of the Host an Event page dashboard.
When a submission is approved, a new event session is automatically created with the submitted location, date, and time. The host is RSVP'd and can optionally receive an approval email with their Host Tools link and a shareable RSVP link.
The event must already have an Event Page and at least one future session before it can be selected for a Host an Event page.
Outreach Tasks
You can create phonebanks and textbanks attached to your event. When an outreach task is linked to an event, it automatically inherits the Invited filter, so only invited People can be targeted.
For more details, see Phonebank & Textbank Tasks.
Co-Hosting Events
Partner with other organizations to run events together. Co-hosting lets multiple organizations share RSVP data, track attendance, and capture contacts—without duplicating effort.
- Primary host creates and manages the event
- Co-host organizations receive a synchronized copy
- Data flows both ways: RSVPs and attendance sync automatically
For step-by-step setup and details, see Co-Hosting Events.
Event Settings
From the Settings section of an event, you can configure:
Scope
Controls which People can be included in the Invited filter. Only People within the selected Scope (Organization or Chapter) can be invited.
Supported Languages
Add languages to enable multi-language automation messages. When you add a supported language, you can customize confirmation emails and reminder texts in that language. People will receive messages in their preferred language.
Event Tags
Add tags to categorize and filter events. Tags are shared across your organization. Any Team Member with event management access can select from existing event tags. Creating new event tags requires the "Add New Tags" permission (the same permission that controls creating new people tags). Team Members without this permission will only see existing tags in the dropdown.
Campaign Tags
Campaign Tags let you associate a resource with a specific campaign so you can track and report on all activity related to that campaign. Campaign Tags are available in the settings of Events, Pages, Phonebanks, Textbanks, Email Blasts, and Text Blasts. You can create new campaign tags by typing them into the field, and existing tags from your organization will appear as options. Campaign Tags are also included in the API response for each of these resources.
RSVP Confirmations
Enable to allow Team Members to confirm RSVPs (in addition to the initial Yes/No/Maybe). When enabled:
- A "Confirm" button appears on RSVP bars marked "Yes"
- The day-before email includes a confirmation button
- You can track confirmed vs. unconfirmed RSVPs separately
You can also set how many days before the event the Confirm button should appear (1-5 days).
Host Tools
Enable to generate a public link for event hosts to view RSVPs, mark attendance, and contact attendees without logging in. Each session gets its own unique Host Tools link. See Host Tools for details.
Co-Host Invite Code
A unique 12-character code that lets other organizations request to co-host your event. Share this code with partner organizations—when they submit a request and you approve it, they'll receive a mirrored copy of your event with synced RSVP and attendance data. See Co-Hosting Events for full details.
Calendar Subscriptions
Chapters and Organizations can generate iCal feed URLs that sync events to external calendar apps (Google Calendar, Apple Calendar, Outlook, etc.).
From Settings → Chapters or Settings → Organizations, find your chapter/org and look for the Calendar Subscription section. Click Generate Calendar Link to create the feed URL.
Once generated, share the URL with team members who can add it to their calendar app. The feed automatically includes:
- All public events marked "Show in Web Calendars"
- Events from today going forward
- Event title, time, location, and RSVP link
Tip: Calendar apps sync periodically (usually every few hours). New events won't appear instantly.
To invalidate an existing link and generate a new one, click Regenerate. Anyone using the old URL will need to resubscribe.
Event Timezones
Event session times are stored internally in UTC and converted to a local timezone for display in each context:
| Context | Timezone Used |
|---|---|
| Dashboard | The scope's timezone (Settings > Chapter Structure > Chapter timezone), or the logged-in admin's timezone |
| Public event page (in-person) | The event location's timezone, derived from the event's address coordinates |
| Public event page (virtual) | The visitor's device/browser timezone |
| Email confirmations and reminders | The recipient's chapter timezone |
| Calendar invites (.ics) | The timezone is embedded in the .ics file so the recipient's calendar app displays it correctly in their local time |
When creating or editing event sessions, the time you enter is interpreted in your scope's timezone (shown in the timezone selector on the recurring schedule form). This means if your scope is set to "America/New_York" and you create a session at 6:00 PM, it will display as 3:00 PM for someone viewing it in Pacific time.
Private / Unlisted Events
There is no dedicated "private event" setting, but you can effectively create unlisted events that are only accessible via direct link:
- Don't create a public event page for the event. Without a public page, the event won't appear on your website's event listings.
- Create a standalone form page (a Basic Form) to collect RSVPs instead, and share that form link directly with the people you want to invite.
- Alternatively, create the event page but don't link it in your website navigation. The page will exist at its URL but won't be discoverable through your site's event listings unless someone has the direct link.
If you want the event to appear on your website but be restricted to certain people, use the Invited filter to control who sees RSVP bars in the dashboard and app, while still allowing anyone with the link to RSVP on the public page.
Cloning Events
You can clone an existing event to quickly create a new one with the same settings. From the events list, click the ⋮ menu on any event and select Clone. You'll be prompted to set a new title and choose the first session's start and end time.
The clone copies the event's settings, all sessions, event page, and text templates. If the original event has multiple sessions, the spacing between them is preserved automatically. Zoom meeting data is cleared so new meetings are created fresh for the cloned event.
Co-hosted mirror events cannot be cloned. Clone the original event instead.
Updated 23 days ago